Pages

Showing posts with label main. Show all posts

Thursday, May 24, 2012

3 ways with pizza dough

You know those cravings that won't leave you. The ones that creep up at in appropriate times. Cravings that whisper in your ear "that just doesn't taste right" when you eat something that isn't what you crave. Fill your mind to the point where not even your favourite series, your child's laughter or your husband's loving words can penetrate the thoughts of making or eating that which you crave? 


I see you nodding and so you will understand when I tell you about my pizza dough craving. It wasn't about what was on top, that didn't matter. It was the flavour and texture of what makes a pizza a pizza that took residence in my head and would not leave. 


So I paused Lost Girl, got up and made the dough. I had no idea WHAT I was going to put on it but the dough was made. Next I went foraging in the fridge, freezer and cupboards for something to use. No, going to the shop was not an option....because...stop it! No! aaaaanyway. In the freezer I found a beautiful piece of beef fillet which I had trimmed off a larger piece I made a few weeks back, some roasted red pepper and tomato soup and a couple of sausages. In the fridge a tiny bit of cheese and in the cupboards onion and spices.


So I went about creating these 3 tasty snacks for us, never having to leave the house or dress in anything but slippers and PJs (see why the shop was not an option). I turned the sausages into cows in blankets (beef sausage see), the meat I fried up with some onions, caramelising it a little then made balls of meaty goodness. The roasted red pepper and tomato soup was cooked down and thickened and made a beautifully rich base for the pizzas I made with cheese and some onion and the rest of the dough was mixed in some caramelised onions to make little dinner rolls (that never made it to dinner)


Pizza Dough

1/2 cup warm water
1 sachet activated dry yeast
2 + 1 cup 00 flour (or half white bread flour half cake flour)
1 tbs olive oil
1/2 tsp salt


Put the yeast in the warm water with a pinch of flour and allow it to bloom. Mix it in with the 2 cups of flour and knead adding the 3rd cup as you knead the dough. Kneed in the olive oil and salt. Place ina oiled bowl and cover and allow to rise. 
Once the dough has risen, knead it to knock out or the air bubbles and divide it into the number of portions you need. (If you are freezing the dough this is when you do it)


Monday, May 14, 2012

Baa Baa bolognese

I love when plans come together. When you have a tiny seed of an idea and with the right kind of nurturing it starts to grow into the seedling of something amazing. Some ideas, like some seeds, when planted at the wrong time or in the wrong place never sprout but others, oh they even surprise. That was why I was cooking supper for Jon from i shot images.

I had an idea, I thought he might be the person to help me grow it and what I got in return for sharing this project with him was more than I could have ever imagine. The excitement I was holding back, in case I was totally off the mark, he let show immediately. I started to hope, to dream and to plan. After a great brainstorming lunch out I thought a working dinner in would be the logical next step.

After telling Jon that I was cooking his reply was "Whoot! Such a privilege.. " and I started to panic. The pressure was on and my culinary creativity went into overdrive until my loving husband reminded me that keeping it simple was always a winning idea. So the meal of bolognese, and a new technique I had spotted on Rhodes across Italy that I had wanted to try, came to mind. As if by fate, Frankie Fenner tweeted about the lamb mince they had in stock and a meal was born.

The technique? Well before adding the tomatoes to the Ragu di Bolognese you add milk. Yes, milk. I knew this would make a difference, there was no reason to not believe that but I had to see for myself. So I fried off some lardons, cooked the mince with the usual carrot, onion and celery mix (also known as soffritto) and tasted the mince. Then I added the milk and cooked it till it was all soaked up by the mince and tasted again. The difference was not as subtle as I expected. The meat was softer, almost creamy and I from now on, that step will be added to my usual process (that is, if I don't forget)

Considering everyone went back for seconds and Baby Bug gobbled his portion with no complaints I figured this is a winning recipe. You can use any mince you have available but the lamb mince was a very nice change from the usual.

Baa Baa Bolognese

1 tablespoon lardons (or olive oil)
1 large carrot
1 cellery stick
1 onion
750g lamb mince
1 cup milk
1 tinned peeled and chopped tomatoes
1/2 tin water
1 tsp sugar
1 tsp dry oregano
salt and pepper to taste

Fry the lardons until the lard melts and add the carrot, cellery and onion.
Fry till soft then add the mince and brown.
Once the meat is cooked, add the milk and cook on a medium heat until all the milk is soaked up.
Add the tin of tomatoes, water, sugar and oregano and allow to simmer on a low heat for at least 1 hour.
Season about 20 minutes before serving.

I served mine with Rigatoni and toasted ciabatta.


Disclaimer: Sorry for all the mixed metaphors, entertaining the bugling and blogging is new to me.

Tuesday, May 1, 2012

Canderel Yellow - The experience


There is much bandied about in the blogesphere about freebies. Some love them, others hate them, some get to many and others sulk for lack of any. For me a freebie are welcomed like any gift, as long as the giver understands that I will be honest in my review (if they expect one). Canderel didn't expect one when they invited me to cook up a storm at The Cook's Playground. All they wanted was feedback.
Sneaking a bit of tuna sashimi before putting it in the pan

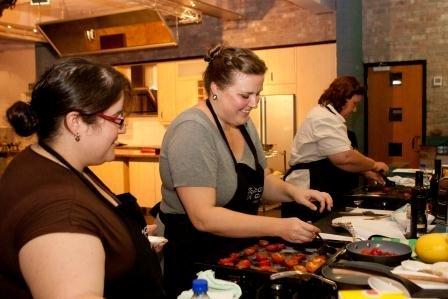
For me the best event invitation is one where I get to cook. Sure, sitting at a beautiful restaurant, enjoying magnificent food is great but it makes my night to be able to participate in the making of that food and to learn, teach and experience every step.

On this night we got to do it all. Drink bubbly, eat good food and too many lots of chocolate coated almonds. Old friends got to chat, new friends were made and near future invitations were extended (more on that in the next post)

Myself, polkadotcupcake and ninatimm preping the tomtoes for the Tart Tartin

Canderel teamed up with Jenny Morris to create 2 mouth watering, savoury dishes using the Canderel Yellow product, a sweetener designed specifically for cooking. We baked gorgeous tomato Tart Tartins and succulent tuna steaks with tangy sweet and sour salsa. We finished off with a bright fruit soup, that Jenny made for us with seasonal fruit, young coconut and coconut water, flavoured with almond extract and Canderel Yellow.

As soon as a nice warm, not so wet, day comes along I plan to attempt meringues with Canderel Yellow. If I succeed I know of a lot of very happy sugar free people.


Mini Tomato Tart Tartin

This makes a stunning starter or could be served as a main course with salad. For ease it can be made ahead if required. The tomatoes turn wonderfully sweet and caramelised once cooked.
1 Serving
15 minutes preparation time 
30 minutes cooking time
Save 40 calories
7g fat (per serving of which saturates 3g)
144 calories (per serving)
19g carbohydrates (per serving – of which sugars 9g)

INGREDIENTS
3 tomatoes, cut in half
2 tsp granular Canderel Yellow
A few fresh thyme leaves (optional)
25g/2oz ready bought light puff pastry
Fresh basil leaves for garnish
YOU WILL NEED A 10CM ROUND FRYING PAN

METHOD
1 Preheat the oven to 200C/Gas 6
2 Add the tomatoes to a roasting tin and sprinkle over 1tsp of Canderel Yellow and season with sea salt and freshly ground black pepper. Cook in the oven for about 15 minutes until they just start to soften and wilt a little. You want them to retain their shape.
3 Whilst the tomatoes are cooking, roll the pastry out on a lightly floured board to a 10cm round. Put to one side.
4 Now spoon the tomatoes out and sit them cut side down in a small pan along with the thyme if using, then add the remaining Canderel Yellow. Cook for a few minutes until some juices run then remove from the heat.
5 Sit the pastry over the tomatoes, tucking it in and around them. Put in the oven and cook for about 15-20 minutes until the pastry is golden.
6 Remove and leave for a few minutes then invert onto a plate, be careful as the pan handle will be very hot. Garnish with basil leaves.
Tip: If you haven’t got a mini pan, you can transfer the tomatoes to a mini tart tin or oven proof dish before covering with pastry


Sicilian style swordfish

This meaty fish is griddled and served with a sweet and sour mix of herbs and sultanas. Protein rich swordfish is filling so a lightly dressed salad or spinach is all that is needed.
2 Servings
15 minutes preparation time  
20 minutes cooking time
Save 10 calories
18g fat (per serving of which saturates 3g)
285 calories (per serving)
9g carbohydrates (per serving – of which sugars 9g)

INGREDIENTS
2 swordfish steaks
2 tsp olive oil
For the sweet and sour sauce;
2 tbsp extra virgin olive oil
Juice of 1 Lemon and zest of ½ of the lemon
Handful of fresh flat leaf parsley, leaves only, finely chopped 
2 cloves garlic, grated
Few stalks of fresh oregano, leaves finely chopped or use dried   
25g/2oz sultanas
1 tsp granular Canderel Yellow

METHOD
1 Lightly brush the swordfish steaks with olive oil and season with salt and freshly ground black pepper.
2 In a bowl add all the sauce ingredients, season with sea salt and freshly ground black pepper, taste and adjust as needed. Put to one side. 
3 Heat a griddle pan until hot then add the swordfish steaks one at a time and cook for about 3-4 minutes each side, depending on their thickness, you want the inside to remain still pinkish. If you overcook they will become dry.
4 Serve the swordfish on a plate and spoon over the sweet and sour sauce and serve with baby spinach leaves or a salad.
Tip: If you can’t find swordfish use fresh tuna steaks instead (which is what we did)

Note: Images and recipes were supplied by Canderel. I was not paid to do this post, only shown a really good time and a product that is easy to work with.


Friday, April 20, 2012

Trinchado

The start of something beautiful
When you have a relationship with some one for many years, living in the same house, sharing meals, you learn their preferences, their quirks. You discover what makes them turn up their nose and what makes their ears perk. After 7 years with Jack I can happily say that I KNOW the man and I KNOW what he loves.

My misfortune is that my husband is a man that eats because it is something that is needed to survive. He does enjoy things that taste good and has preferences but he does not go googly eyed at a well presented dish or get a far away stare when something so good touches his tongue, random "mmm" sounds do not escape his lips when he tastes something amazing. He will even eat things he isn't crazy about in the right company.

simmer away
He does, however, have his favourites. Something he will order every time we go to a certain restaurant or something he loves for me to make for him if I have a chance. One such thing is Trinchado. A Portuguese beef stew, rich with flavour. My favourite thing about this recipe is how forgiving it is of adjustments, especially the kind of adjustments that make it a healthier option.

The long cooking time means you can use lean cuts of meat and using evaporated milk or regular milk (carefully), while not making the dish AS creamy as using actual cream, still make for a very tasty dish. I personally don't miss the olives in the dish when I need to take them out for TheSister and my favourite adjustment has to be the wine.

A little longer

Trinchado

What you need:
1 tbs butter
1 tbs olive oil
(or 2 tbs olive oil if you want to reduce the fat)
1kg beef, cubed (as this is a stew you can decide how lean you want the beef)
2 large red onions, chopped
2-3 red chillies, chopped
4 garlic cloves, crushed
250ml beef stock (I used NoMu fonds, the richness is unbeatable)
1 bottle red wine, minus 1 glass for the cook (I used Pinotage)
1 bay leaf
100g black olives, stones removed (optional)
1 sprig fresh rosemary
125ml cream (or evaporated milk or regular milk)
1 tsp lemon rind
Salt and Pepper to taste

What to do:

Heat the butter and oil in a heavy-based pan and brown the beef.
Remove from the pan and set aside.
Lower the heat and saute the onions, I like to put in some water so that the onions get soft without burning, when the water has evaporated add the chillies and cook for about a minute.
Add the stock and wine. Bring to boil and stir continually.
Add the bay leaf, olives (if using) and the fresh rosemary.
Add the crushed garlic
Return the meat to the pan and simmer slowly for 2 hours (or more).
If you are making this in advance, this is where you stop. The rest of the process happens just before serving. When you are ready to serve, gently heat up the trinchado to a medium heat.
Add the cream (or substitute) and stir through. If you are using milk instead pour slowly and carefully to avoid it splittin.
Add the fresh lemon peel and if you want extra rosemary.
Season to taste

You can serve trinchado as a starter with some bread, or a main course with rice.


Wednesday, November 30, 2011

Buffet style sweet & sour dumplings


When TheHusband and I started dating I was living in a digs in "Little Mowbray". I wasn't really a student at the time but my friends were and well I was tired of living at home. My relationship with my parents was strained from moving out of home and smoking and (not really) working for my dad.

In walking distance from our house we had some great food options. Some for the begining of the month (Greek and Chai Yo), one for mid month and special (read: reasons to get drunk) occasions (Fat Cactus) and one for just before the end of the month (when you know you really shouldn't but you really don't want to eat at home) and that was a "chinese" buffet place. I forget the name, it changed so often as did the clientèle. They are no longer there, I believe their fatal mistake was adding a sushi bar (which was not all you can eat like their buffet)

Sunday, September 11, 2011

Anything for love "huevos" rancheros


If you have a partner you have been where I was this morning. Dreaming from the night before about using my texmex left overs for my very first attempt at Huevos Rancheros. Getting up I asked "TheHusband" if he would like a cheese omelette and got a resounding "yes" so bounced (as much as an 8 months pregnant lady can) off into the kitchen to make our respective breakfasts. I open the carton of eggs only to discover 2 lonely eggs staring back at me.

What do I do? Tell make TheHusband porridge and hope he forgets he was offered eggs, or give up on my breakfast fantasies? As you may have guessed from the title of this post I chose to forfeit the eggs. I however do not regret it as my breakfast was delicious (and ultimately way too much for me anyway)

Add to taste Rancheros plated

Monday, July 18, 2011

Truffle Salt Risotto


I was never very good at physics, in fact I was shocking (no pun intended). Even if I memorised the rhymes till I turned blue in the face, when it came down to a test or making something work I didn't know my positives from my negatives and failed every time. On the other hand, when it came to chemistry I was "Queen of the Lab", I loved the way things worked and how 1+1 did not always =2. Unfortunately at my school we just had "science" as a subject and so, although my chemistry scores were FANTASTIC, my physics scores were so flat I had to drop "science" as a subject.

Thursday, March 24, 2011

Roasted veg with Walnut & Rocket Pesto


Winter has come for a quick educational* before it's arrival in a month or so and with it come the visions of warm comforting food and snuggling up with a hot drink while watching TV or reading a good book. It brings to mind the Afrikaans saying "Maagies vol ogies toe" meaning when the tummy is full the eyes want to close. This is all well and good if you hadn't had a pig-out weekend like mine.

Hummus im Basar on Sunday night, Romanian Kebabs with wedges on Monday (forgive me, it was a public holiday and I had forgotten it was meant to be meat-free) and then all-you-can-eat sushi on Tuesday night. I was looking for something comforting and warm but still light and healthy.

I first thought about what I would consider "Light & Healthy" and vegetables came to mind. Then the "Warming" aspect and roasting sounded like a grand idea. Next it was about what to serve it with and cous cous just was naturally at the top of the list. Relaying my idea to my father (who was also a little fed up with the heavy eating) I came up with the last minute idea of adding a little bit of feta to the mix. Viola!

Popping into the shop I looked around for some nice roasting veggies and was about to head downstairs for some more veggie hunting (after picking up some Willie's Cocoa for next to nothing" when I saw it was almost FOUR. Why is this a problem? Well see, we are currently living with my parents and the domestic worker leaves at 16:00 but some one has to be home when she leaves. So off I rushed with what ever I had, which in the end proved to be plenty.

When it came to assembly I realised that as much as I enjoy the olive oil + rosemary combination on roast veg, I felt like something a little different. I recalled a jar of Walnut and Rocket pesto sitting in my fridge and from there a star was born.


What you need:
1 Packet carrot balls (or chop up some carrots)
4 or 5 baby peeled onions (the kind that are perfect for pickling)
4 small mixed sweet peppers, sliced into quarters
1 small brinjal, cut up in cubes, salted and rinsed
2 cups mushrooms, sliced
4 or 5 cloves of garlic, peeledA
1 jar pesto princess walnut and rocket pesto (or make your own if you can't get any)
1 packet vine ripened cherry tomatoes, on the vine
2 cups instant cous cous
1 teaspoon salt
2 cups boiling water
1 cup crumbled feta (we used a combination of black pepper feta and Fairview's no-brine feta)

What to do:
Preheat oven to 200°C. 
Throw all the vegetables, except the tomatoes into a baking dish. 
Coat with the pesto and pop into the oven.
Set a time for 20 minutes.
At 20 minutes take the veg out and give them a stir, pop in the tomatoes.
Roast for another 10-15 minutes then turn the oven off but leave the veggies inside.

In a large bowl pour the 2 cups of cous cous.
Sprinkle the salt over the top and then pour in the boiling water.
Cover with a tea towel.
After about 5 minutes use a fork to break up the cous cous.
Cover and leave until ready to serve.

Serve the vegetables on top of the cous cous and sprinkle some (or lots) of feta to finish.

The verdict? 3 out of 5 people said it hit the spot. Of the other 2 the one doesn't eat roast veg (she got roasted butternut and loved it) and the other is TheHusband who complained that it wasn't meat :)


*An educational is a fact-finding trip that companies make before using a service provider


Disclaimer: Pesto Princess did give me the pesto for free but I was under no obligation to write a favourable review.

Monday, February 14, 2011

Hot water crust pie


Pie, I think there is a version in almost every culture. Short crust, puff or none at all the crust vary and some are easier then others. I have always used store bought *ashamed* and sometimes, for sweet pies I made short crust. I was about to pop some puff pastry out the fridge for a chicken pie when my sister gave me a "look". See the whole family is on a health drive and well, puff pastry if full of that heavenly evil "butter". 

We both concluded that if I made my own pastry, even if it had butter in it, it would have a lot less than the store bought puff pastry. 


I remembered seeing, on one of those in between sections on Food Network, something about "Hot water crust pasty" and googled around till I found a recipe I was happy to work from and then promptly changed it completely. Those that bake will know, changing a recipe before even trying it is like playing with fire but I figured what the hell. I had a really tasty filling and back-up puff pastry in the fridge. 

Hot water crust pastry (makes 2 pies)

What you need:225g Whole brown bread flour
225g Whole rye flour
2 tsp salt (the stone ground flours need a little more salt then regular flour I find)
200g butter
225ml chicken stock (My filling was made with shredded chicken which I boiled so I used the stock from that)

What to do:In a mixing bowl whisk the flours and salt together (whisking adds air that you would normally get from sifting, but since I used whole flours sifting wasn't an option). Make a well in the centre. Melt the butter in the stock. Pour into the well and mix immediatly until combined. Knead the dough a little. 
From this point use however you want. The hot water crust pastry is worked with warm, unlike shortcrust that must be chilled. 

Note: Any fat can be used where the butter is used so you can replace it with margarine to create an equally great vegan crust.

Sunday, January 16, 2011

Spinach and Mushroom parcels - Meat Free Monday

The last 2 weeks have been rather tedious. I was helping my dad out answering phones while his receptionist was away on annual leave. I spent many an hour playing facebook games and wishing I had uploaded some images for blogging. I was not on my own computer so had no pictures with me and so you didn't get any new recipes to try. Sorry :(

However you did get a new look and feel, like a new space to visit. They say a change is as good as a holiday :)


So it is Monday again and with it comes the dulcet sounds of my family moaning at me that they don't understand how 1 day a week can make a difference. With it also comes me ignoring them. Some weeks I just quietly make my own little meal to eat, others I make a dish with several components so those who choose to can eat Meat-free and other days I make something so delicious, they don't care if there is meat or not.

Such was the case with these little phyllo parcels. With the meatiness of the wild mushrooms and the creaminess of the spinach, these edible presents ticked every box in the house.

What you need:
3 bags baby spinach
1 box mixed wild mushrooms
1 tub fat free smooth cottage cheese
1 onion
1 medium potato
½ fairview single salad serving feta (or 1 wheel)
garlic
smoked paprika
olive oil
salt and pepper to taste
Phyllo pastry

What to do:
Wash the spinach very well (rule of thumb is at least 7 times, no one likes sandy spinach)
Chop half the onion finely, do the same with the potato (the pieces should all be roughly the same size and very small). Heat up some olive oil in a wok or large pan. Saute the onions and potatoes then add the spinach and mix till wilted (depending on the size of your wok/pan you made need to add the spinach in stages). When all the spinach has wilted add the garlic ad stir well. Then add the cottage cheese and crumble in the feta. Turn off the heat and stir well. Slice the other half of the onion into slivers. In another pan toss the onion and the smoked paprika in some heated olive oil, then add the mushrooms and fry until browned. Add the mushrooms to the spinach mixture, mix well then season to taste.

Cut your phyllo into long strips (I use scissors). Brush one piece with olive oil and stick another piece on top of it. Spoon some filling into it and fold as you wish, using a little more olive oil to seal it. Heat up the oven nice and hot and turn on the grill  and grill until golden brown and crispy (you filling is cooked and should be warm, if the filling has cooled then place the parcels into the oven at 180°c for a few minutes and then pop them under the grill)

You can serve them steaming hot, or even instead of sandwiches for school or work the next day

Wednesday, December 8, 2010

Sushi for beginners


I am one of those people who wishes the "sushi fad" will pass, I have been wishing this since it started being a fad. Since people started eating sushi with a knife and fork, with salt and pepper. Since people started putting biltong and cream cheese in sushi. What do greek restaurants have to do with sushi exactly? I may be unpopular for my thoughts but so be it. I started eating sushi 15 years ago when it cost a lot less because it was less in demand and I would really like it to stop being a luxury already.

It's not all bad though, while in most places sushi is still stupidly expensive, without it being a fad we wouldn't have great all you can eat specials. Sushi supplies are also a lot more readily available in shops all over the place. So not all bad because it means I get to make sushi.

There are 2 secrets to great sushi. The rice and the fish. The rice needs to be slightly sticky but not mushy and the fish needs to be as fresh as possible. If you have those 2 things right, the rest is all just practice, practice, practice.

I learned by watching sushi chefs when ever possible, for me the videos and "sushi making kit" booklets were just confusing but watching masters at work put it all in perspective. I roll the pieces with my hands then shape with the mat, I find that the easiest. You, however, must do what feels right. Make sure your nori is fresh, if it's not 100% fresh, toast it a little. Fill it with what ever your hear desires and remember to clingwrap your mat.

Sushi rice

What you need:
4 cups sushi rice
4 cups water
1 cup rice wine vinegar
3 tablespoons sugar
1 tsp salt

What to do:
Soak the rice for an hour. Drain then put in a pot with a tight fitting lid and add the 4 cups of water. Bring to the boil, cover and drop to the lowest heat possible. KEEP COVERED, do not lift the lid. Cook for 15 minutes then take off the heat. DO NOT LIFT THE LID! Steam for another 15. 
In the meantime heat up the vinegar with the salt and sugar till everything dissolves. 
When the rice has steamed, you can now take the lid off (no more shouting I promise), pour the rice into a plastic or wooden bowl. Pour the vinegar solution over the rice, dispersing it evenly. Mix the rice using a cutting motion to avoid squishing (yes, squishing is a perfectly acceptable word) the grains.

Allow to cool. 

As for the actual rolling part, that is something you need to see but make sure to make the rice layer thin and don't press the rice down or squish it too much

Wednesday, November 24, 2010

"sushi" in a bowl


Monday afternoon, while innocently sitting at work, handing out sushi advice to a friend I received an SMS from the fishmonger across the road. Now before you think there is something fishy going on, I only get them when the tuna comes in. How could I resist, fresh yellowfin tuna (orange on the SASSI list) and after spending so much time explaining to my friend the steps to perfect sushi I had to get it.

Only problem was that it was monday and I am sorry to break the news to you but FISH count as MEAT. When I got home with my tuna I suddenly got paranoid about whether it would stay fresh enough in the fridge to be eaten raw the next day so I decided that marinating was the way to go. I cut 2 steaks from the piece I had and marinaded them in the fridge until the next evening.

Still the sushi idea didn't want to leave so I got to making the rice. however, by the time TheHusband was done with work it was 10pm (I had to go fetch him) and the last thing I wanted to do was roll sushi. So I stopped off at woolies and grabbed some prawns, then fetched TheHusband and hurried home. I coated my tuna in sesame seeds and seared it, stir-fried the prawns with some garlic and spring onions and served it all on a bed of chilled sushi rice with a soya and wasabi mayo sauce.

Sesame crusted seared tuna

What you need (served 2 + leftovers for lunch):
500g fresh tuna
1 tbs hoisin sauce
1 tbs soy sauce
2 tsp honey soy marinade
½ cup water
1 tsp sugar
1 tsp wasabi (more if yours isn't strong like mine)
½ cup white sesame
½ cup black sesame

What to do:
Mix all the wet ingredients together making sure the hoisin is dissolved well. Place the tuna steaks in and leave for as long as possible (mine were in there for longer than 24hours). Heat a frying pan nice and hot. Mix your sesame seeds together and coat your steaks on both sides. Pop in the hot pan for about a minute each side (remember SEARED, not COOKED) then remove and allow to rest for a minute or 2 (I stir-fried the prawns in that time). Slice the steaks into chopstick managable sizes :)

Tuesday, November 23, 2010

Meat free Monday - Parmesan Pancakes with Blue cheese mushroom filling


I have another meat free monday post waiting in the wings and while it was super tasty I just couldn't help it and had to post this one first. 


For some unkown reason I decided to browse my old food24 blog, I think I wanted to check when my blogaversary is supposed to happen but I got caught up in reading my old posts. There I found a recipe I really enjoyed and completely forgot about and the cheese-slut in my rejoiced at the find.


What to fill it with though? The first time I served it with a beef stew but I wanted this for meat free monday so narrowed it down to 2 choices. Mushrooms or Cheese


What was I thinking?!?! Some twitter friends put me right and reminded me that I can must combine the two. Things happened, people were late so I had to rush my shopping. 1 box mixed button and wild mushrooms and then for the cheese...what cheese? Originally I wanted to get some ricotta but the cheesegods did not will it so there was none in the shop. First I picked up a block of haloumi, went to get another can of Dr Pepper and decided Haloumi would not work. I went back and had a brainwave while staring at the contents of the cheese fridge. BLUE!! I grabbed a triangle of the strong and creamy cheese and I was ready for a Meat Free Feast


Wholewheat parmesan pancakes with a mushroom and blue cheese filling

What you need (feeds 2): 
For the mushrooms:
1 box mixed mushrooms, chopped but not finely (or any mushrooms)
1 triangle blue cheese (I used Blue Rock from Fairview)
1 small onion, sliced
3 cloves of garlic, sliced
1 cup milk
Salt and pepper to taste
Olive oil

For the pancakes
2 cups whole wheat flour
2 cups milk
4 jumbo eggs
1 cup parmesan, grated (or to taste)
Olive oil

What to do:
Suatee the onions and garlic in some olive oil till they start to brown. Throw in the mushrooms and stir fry until that lovely smell of cooked mushrooms wafts from your pan (I used a wok) and the mushrooms are about ½ the size. Crumble in the blue cheese and lower the heat so it melts slowly, then pour in the milk and simmer till it all thickens up.

In the meantime mix all your pancake ingredients until smooth, the batter must be slightly watery so if needed add more milk. Heat up a pan nice and hot and coat with olive oil (I pour in a little oil then use a kitchen towel to spread it evenly). Pour enough of the mixture in to make a nice size pancake and swirl around the pan to spread it evenly. When holes appear on the top and don't close up, loosen the ends and flip over. Repeat as needed.

To assemble: 
Pop a pancake on a plate. Put some of the mushroom mix on the one side, then roll that side over, fold up the 2 ends and roll again till the end.

Suggestion: Add some chillies or mix up some herbs for more complex flavours 

Thursday, November 4, 2010

Hummus Im Bassar and Happy Birthday to TheHusband

3 posts in 1 week, incredible! Ok so one of them was to announce this month's sushi club but still, more than usual.

Now my husband is the kind of man who eats because it's food. He appreciates fine food but he isn't likely to mmmmmm and aaaaaaa and smile from ear to ear with a glint in his eye when tasting some something delightful (guess who does?).‡ So knowing his favourite food is a big thing. when he asks for something by name it's even bigger.

Luckily on Sunday he mentioned wanting honey poached pairs, he said it like he didn't think I could do it...hahaha. That coupled with knowing he loved a popular middle eastern dish made his birthday menu easy:
I have no idea if there grammar here is right, please don't kill me
Hummus im Basar 


followed by honey poached pears

Hummus Im Basar:
By now you are probably dying to know what that means (or not, but I will tell you anyway), it translates to "Hummus with Meat" but what it means when you order it at a restaurant in Israel is A plate full of hummus, topped with fragrant minced, or finely chopped, lamb garnished with paprika, olive oil, whole chickpeas and roasted pine nuts. Add to that some warm pita breads, pickles and salad and you have a hearty, healthy and very very filling meal.


The trick to a good Hummus im Basar is the spices. Loads of cummin and paprika, a bit of a cayene pepper kick (in hebrew we call it "hot paprika") salt and pepper. Obviously you need to find the right balance, too much cummin and it will be sour, too little and well it won't really taste right.

This is why I love my mom's Kenwood chef
I minced my own lamb but if you can find it already minced you can go for it. Much like chicken I preffer mincing my own and I can control how fine it's minced. This dish works better with courser mince.
You can learn more about the process of putting food together in a pleasing way by attending California culinary schools.


MAKE YOUR OWN!!!

I admit, there are a lot of really good premade hummus and tahina options, we love to get those done by Salad Valley and Picante but for this dish, make your own. The only shortcut I will allow you to take (because I did) is using tinned chickpeas but trust me if you have (we discovered on sunday night that we had ½ a cup left) dried chickpeas, soak them and boil them yourself, you CAN taste the difference.

To make hummus:
Blend chickpeas with some tahini paste, water to loosen, salt and pepper to taste and garlic to your heart's desire. 

To make tahina:
You don't even need a food processor for this one, so no excuses. Mix together tahini paste with some water, a little bit at a time till the colour changes and it becomes runny, add some lemon juice and garlic to taste and then some salt to finish it off

Don't skimp, every flavour in this dish is important, use a GOOD olive oil, something peppery, both when cooking your meat (high heat, fast cooking, don't boil the lamb) and when serving the dish. The olive oil that comes out of the Arab villages in Israel is something special, cloudy and peppery but fresh at the same time. One day I will learn the secret and then bring it home to make all your lives that much richer.

Tip: to warm your pita breads without drying them up, first heat up your oven till it's nice an hot then turn it off. Pop the pita breads in till warmed through.


Now the pears were something new so I googled. Most of the recipes had white wine and I knew that method already, however my husband doesn't drink, he doesn't like the taste of alcohol so I searched a little deeper and found this recipe 


Really easy recipe, fresh and tasty, although very very sweet. May just drop the amount of sugar we add next time (or taste the pears first and add accordingly)

Monday, October 11, 2010

Veggie soup with homemade gnocchi - Meat free monday recipe


My mom has recently decided that meat free mondays is not a bad idea. So I was happy to discover when we went shopping that what she had in mind was a heart vegetable soup which we packed full with everything from peas, to spinach, baby corn and more (no potatoes).

Something didn't sit right with me and I was sure it was missing something but I just couldn't place my finger on it. Then, while browsing through Meeta's "What's for Lunch Honey" archives I came across this recipe. I immidiately called my mom and asked her to buy some gnocchi to add in. She agreed but first had to rush home so the domestic worker could go home and then she would go shopping. I got home shortly after her and while discussing things I decided that it would be quicker and tastier to make our own gnocchi.

This was the perfect opportunity to go to my list of "recipes I have to try" and one of them was JamieWhoSA's gnocchi recipe. I didn't have sweet potatoes but loads of lovely woolworths organic potatoes.

The soup was my mom's creation but its a basic vegetable soup, flavoured with louvage and parsley, below though is my slight variation on JamieWho's recipe. I was so lucky to have some really awesome ingredients on hand.


What you need:
6 small organic potatoes
1 jumbo free range egg
2 cups stone ground white bread flour
pinch of nutmeg
salt to taste (the stone ground flour has no salt in it)

What to do:
Peel the potatoes and boil in some salted water until soft. Mash well. In a large bowl mix together all the ingredients until you get a warm soft dough.Cover with a tea towel and leave for 5 minutes. Roll the dough out into a sausage shape (I did it in batches), then with a sharp knif cut pices from the sausage. I then rolled them into blobs (very technical I know) and pressed them gently with a fork. In the meantime boil up some salted water and put the gnocchi in. When they are ready they float to the top.

To add a little edge to mine I grated parmesan on them as they came out of the water instead of adding it directly to the soup.